So I had this fabric, that I fell in love with, in the store…..yeah, you know how that goes. Well, got it home and I still love it, but it’s really dinky and thin and see-thru-ish even though it looks like a lush thick gushy fabric that you could make something in winter that would really keep you warm no matter how the wind howls and the thermometer dips.
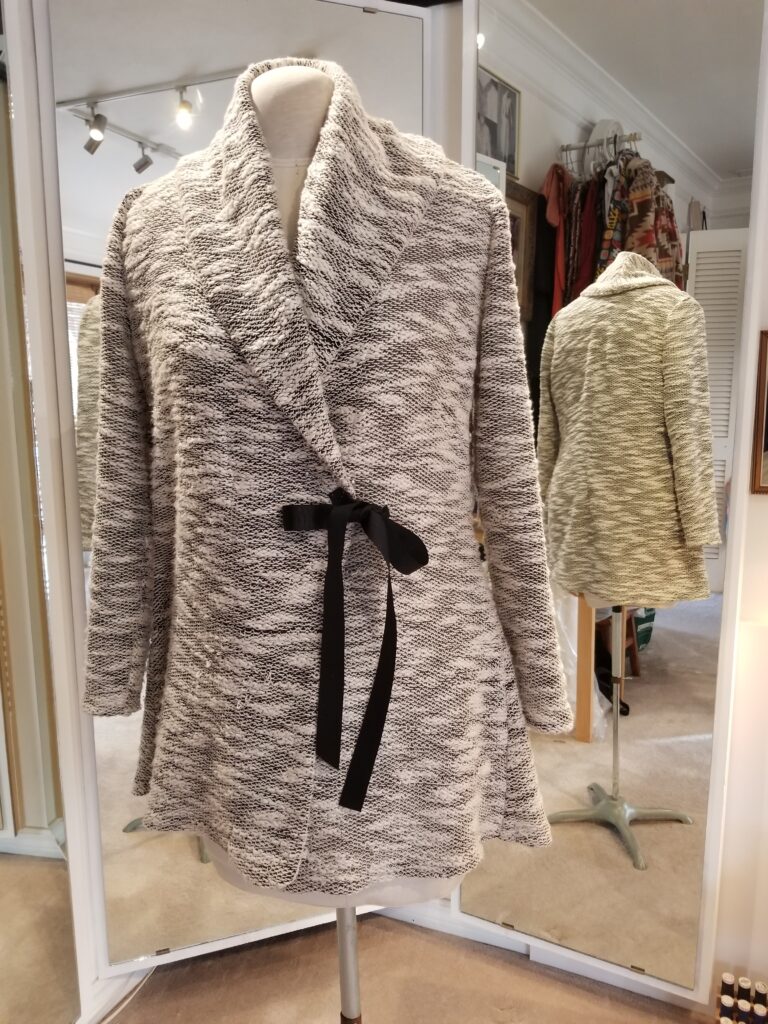
So I got a great idea. Taking my fabulous knit top core pattern, I would create this shawl collar that was bigger than all get out (cause love things to keep me warm around my neck), and then it would be my fav, go-to, thing to put on when I was slightly chilled. Really this fabric is so cheaply woven and such thin strands it’s a miracle it’s remained intact through the construction process. Actually, this is going to be a test for this “big collar look” and so I didn’t mind putting in the effort on this dinky, cheezy fabric.
So I finished this and it was….well…okay, and that’s about what I expected from this dinky fabric, but it was workable. I wasn’t in love with it, but it did keep me warm. Amazingly enough, I found myself wearing it, with a straight pin to keep it together a lot. (NOTE TO SELF: Listen when your heart tells you something!)
So I’ve been wearing this with a straight pin for closure for about 3 weeks now. That’s a pretty good indication that it’s going to be a workable garment. There was the typical button – big, funky and with a loop on the other end to go around the button. Then there was a tie idea out of some cool black on-the-bias fabric, but that really didn’t do anything for me.
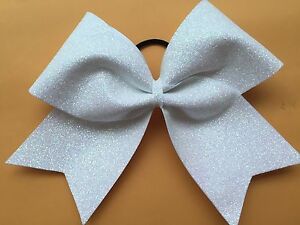
So here’s the little tie thing. This is like the dinkiest ribbon I’ve ever seen in my life. That looks as thin as the ties in MIB. It’s really bad. And this is about the best idea I had. This fabric is so dinky that it really can’t handle any sort of weighty button of any size, and a small button would be lost here. The fabric is also so thin and light that it can’t support a buttonhole, a hook (that would simply drag on the fabric) and most other kinds of closures.

So I’m looking at my Madeline doll I have by the fireplace in the living room. This is the replica of the books featuring Madeline. This was a story of 12 little girls in a convent, one of them was Madeline who got into all sorts of adventures, but they were sweet and innocent.
Suddenly, I’m thinking “The French would have an answer for this, and it would be a big bow!”
Perusing through some “classic” couture looks for the French bow, I found some great inspiration.
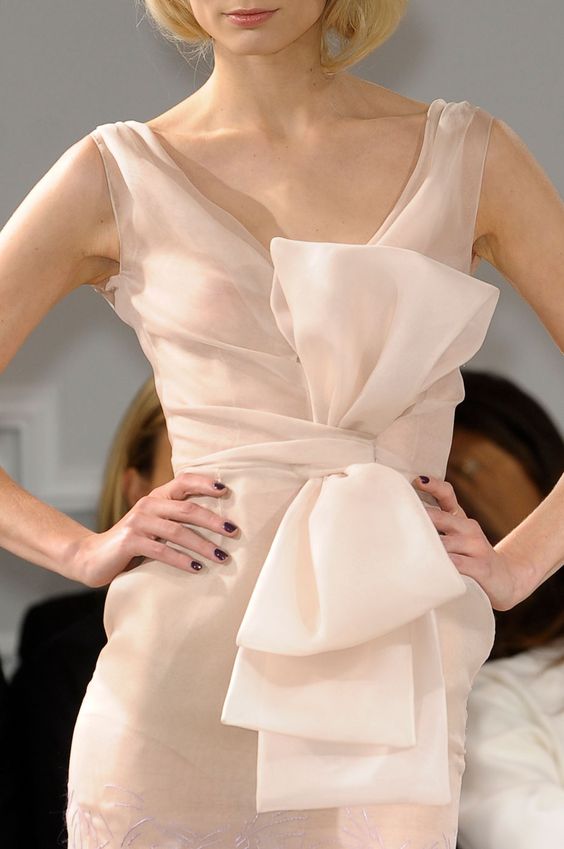

Both of these are typically French and really make a great “bow” statement. They are from different years that John Galliano was at Dior. And although they look smashing, and maybe at a different age, I wouldn’t have a problem wearing this, this sort of look (and I do love it) is simply not my look at this time in my life. If I had a client that I though would love this, I would do it for her in a minute.
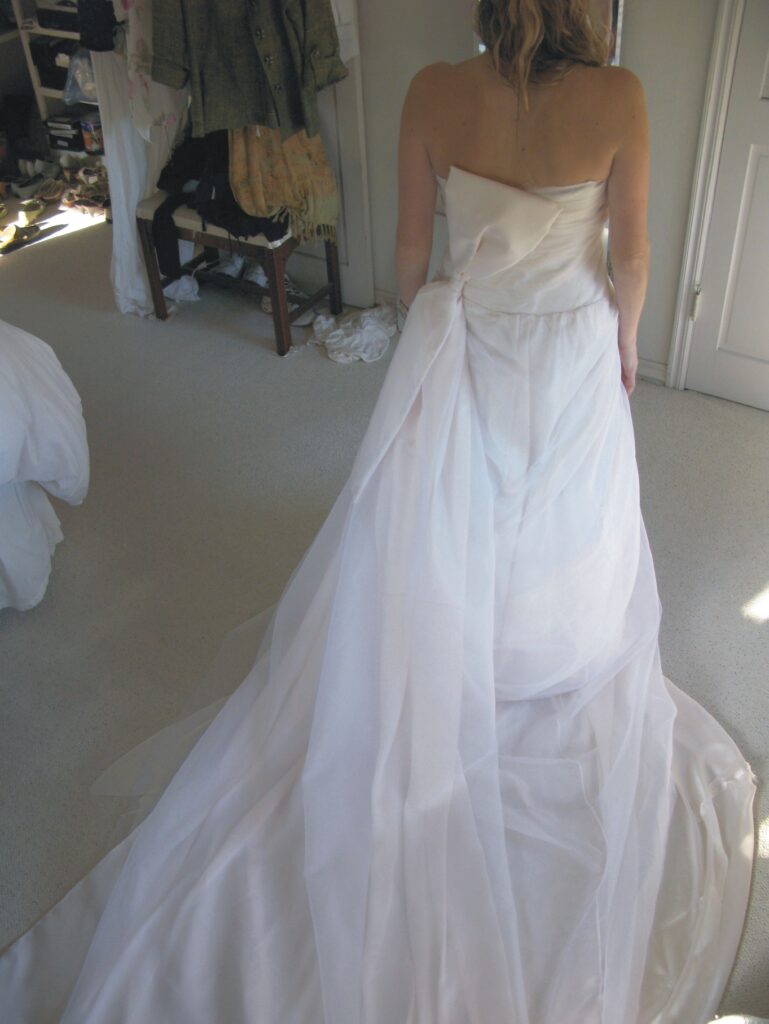
As a matter of fact, I actually did do this for my nephew’s fiancé. Instead of having the train in back, we had it to the side and back and it made a really dramatic statement!
But this is great on younger more dramatic types and although I love this look, it really isn’t for me. I can be dramatic, but not this way.
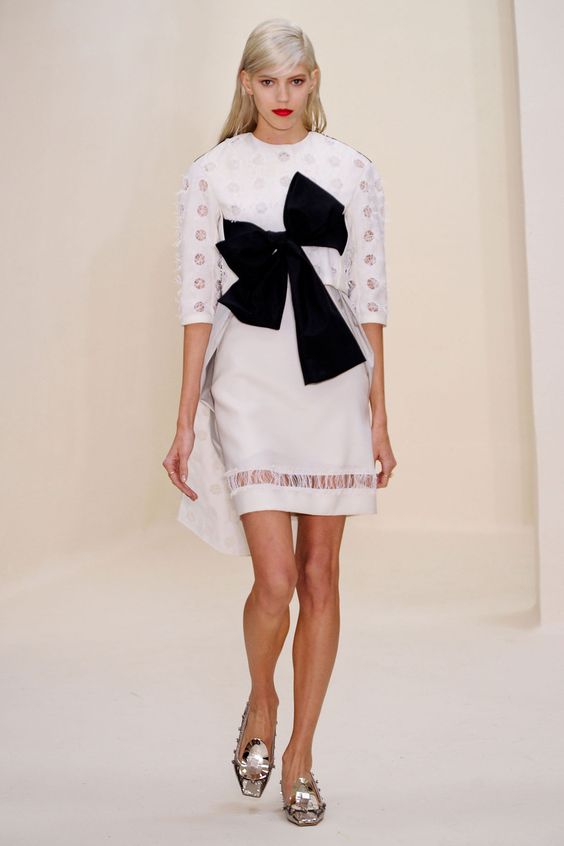
But suddenly seeing this, I’m thinking – this is a great look. It’s dramatic. It’s exactly what I’m looking for. But there’s a problem with a bow this big.
The problem is with a big bow, comes a big knot and it’s always a mess. The big bow part is pretty and the sashes are pretty, but there’s that big knot.

But what happens when that knot isn’t so big but the bow and sashes are? And how do I make this so that I can tie it over and over with it looking the same?
Well, that isn’t as hard as it sounds. The fun thing about fabrics, and things is that you can really manipulate the heck out of them if you simply think this through. So tying that dinky ribbon before, I looked at where it was all scrunched up and it was right at the point where the ribbon is attached to the jacket and a little further from that point and that’s all that’s required.
And suddenly I’m in love! How utterly stylish and very Madeline-ish. It’s very French looking and classic at the same time.
So here’s what I did. I folded the ribbon in half, then folded the edges to that pressed half line and folded on top of each other and pressed like crazy.
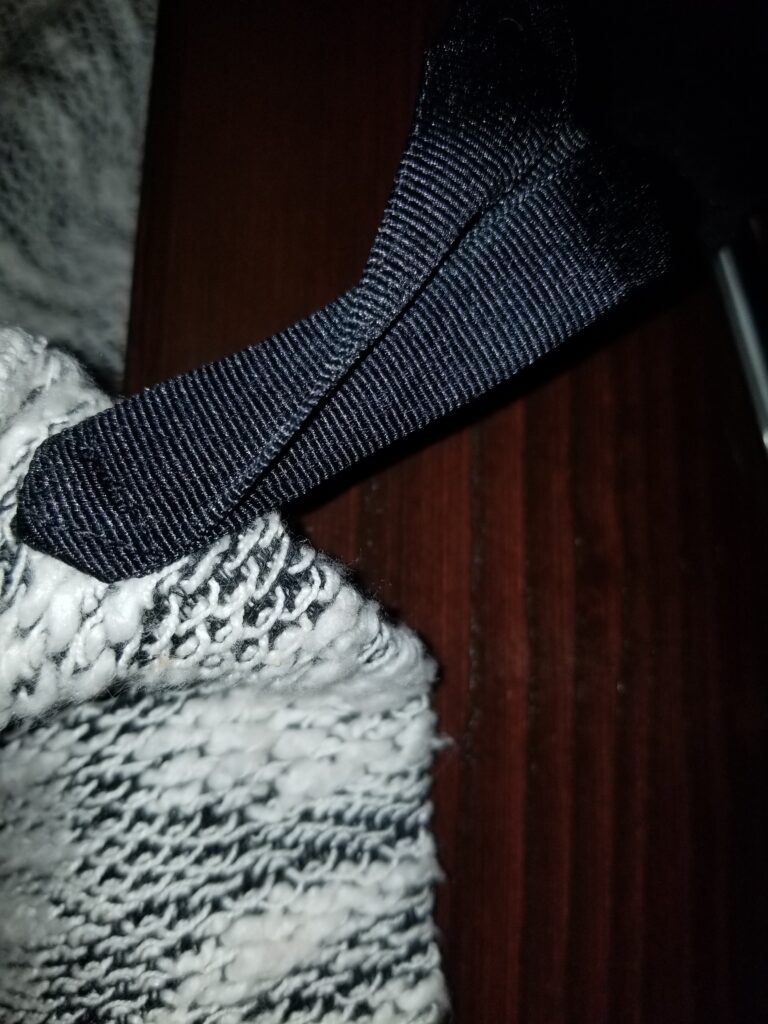
Then I folded the end to a point and sewed on a triangle to tack it to the jacket. I also pressed the fold to about 4″ into the ribbon. This keeps the tied part very folded together and very compact. This solves the problem of the big bow knot, and keeps the bow and the sashes full and luxurious looking. Not only that but it makes it great statement.
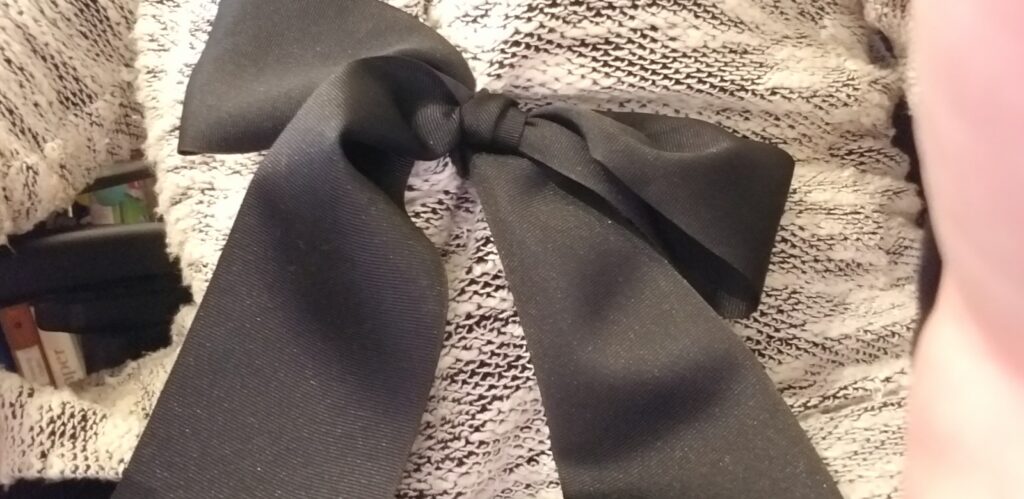
Everything is porportional here – no big knot to take away from the gorgeous bow and sashes. And I did this with grosgrain, which has a “grab” to it so it stays tied much better than a satin. It also has more body so that it stays in place and doesn’t droop. French bows do not droop!
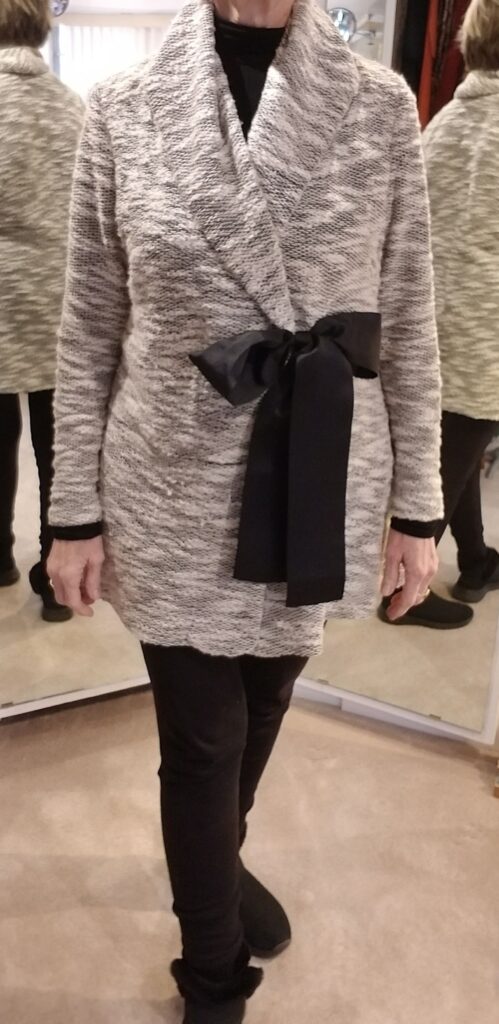
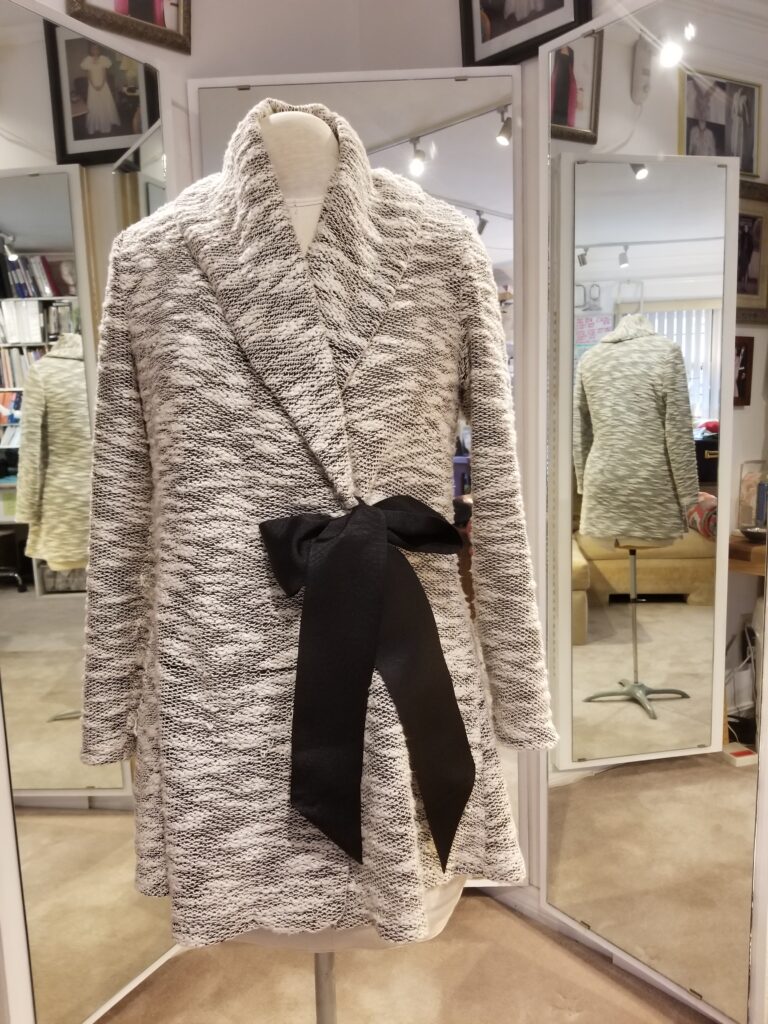
So this makes a great look even with leggings – a little couture design with what might have been a throw-away garment. The main reason I saved this though is because that core pattern is so good and such an excellent profile on me, that it’s hard to let this go. This is exactly what comes from using your core patterns to make all sorts of fun things. I simply drew up a big shawl collar, but I did have to review a couple of shawl collar patterns to remember exactly how that back collar angles to fit the back neckpiece, but after that, it wasn’t that hard. I did a tissue fit to check to make sure the collar was big enough and not too big, and boom, I was off to the races. I’m still amazed at how many times I’ve made this pattern up and tried to goof it up, but the line is so good, that it’s almost impossible to goof up this core pattern.
This is a little trek of how the design process takes place.
- Use your core pattern to start – this will almost always guarantee success.
- Do a tissue fit, particularly if you are doing something really different or outrageous to check to make sure your line and proportion are correct and the look you want
- Don’t be afraid to live with it for a while. Inspiration is amazing how it will come to you particularly when you have so much right about the design (which comes from using your core pattern).
- Always do a muslin. That’s actually what this was supposed to be but with the addition of the bow, it’s going to be a go-to, keep-warm jacket/top for the rest of this winters and winters to come.
So let your imagination run with you. You’ll be amazed at what you end up with – especially when you start with a core pattern that’s flattering to start!
Love this! I would totally wear it. Great solution.
Ann, thanks – the bones of the look were excellent. This is a core pattern that’s now going into its 20th make-up. The variations on this have outgrown even my most glorious speculations. I’m now working on a raglan-ish look with this same core pattern. (I feel another blog coming on!)
Absolutely lovely. I love it!!!
Thanks Marilyn – I feel tres Français in it!!!
I really love it, and enjoyed reading about your process. The bow is perfect. It reminded me of making a flower girl dress for my granddaughter. Pretty deep purple crepe backed satin sash and bow on a white dress. I cut the sash on the bias, lined it with a double layer of tulle to make it not flatten out and tacked clear elastic loops at the side seams and center back so it didn’t droop. I always say, I should have taken some engineering classes. Bravo for a very chic garment.
Exactly – a perfect example of manipulating fabric to get the look you want. Taking a relatively thin or limp fabric and you can add to or take away to make it drape, hang, fold, and basically stay the way you want, is one of the fun things about sewing and design that I love. It does require some experience, that most professionals get in school. So if you want to learn that don’t be afraid to experiment. You above all else know what you want and perusing through the fabric store to get the feel of what you want is the perfect way to learn. We know that feel and that look, and messing around and experimenting (which is basically what students do in school) is a great way to learn.
I have a lot of knits in my stash – everything from very stable pontes to ooshy, gooshy, stretchy, all-over-the-place knits…you know the ones I mean. To make it easy to deal with these highly variable fabrics, I have a collection of three core patterns (I call them my “blocks”) for knits, varying depending on the crosswise stretch: for 35% of so (like stable pontes), 50% or so, and 75% or greater stretch. The first two have darts (since I have a 36J bust, I’ve learned to be ok with a dart in knits) and a seamed sleeve for more ease around the bicep. With the stretchiest of knits, I can get away without these adjustments.
My ASG buddies tease me about going overboard with my blocks, but it makes it so much easier and FUN to dive into my knit stash and know that what ever strikes my fancy will have an appropriate pattern ready to go.
AND, you’ve inspired me to experiment with a shawl collar – it’s cold here in Seattle right now, too!
Let them joke about your “blocks” but here’s the thing…over and over again you will have successes, and you are so great to have 3 different blocks for your knits. This is the very best way to have the most success. And no one will know that you’re using the same pattern over and over unless you tell them.
FBAs in knits make them that much more yummy. A lot of RTW think that fit, especially in knits is something they don’t have to do. When you take the trouble to do the FBA suddenly you’re styling and line is excellent and most often the comment I hear is, “Oh well, you’re lucky cause you to wear a perfect size (fill in the blank)!” When in reality, you simply have fit the pattern to you in a flattering line. Something RTW has NO familiarity with at all. And a flattering line still looks great no matter how many times we haven’t seen it.
Stick to the core of your “core” pattern, and basically, all you have to do is draft that front piece, and trace enough for a facing (upper collar – I like to trace the outside then the inside starts at neck/center back point, follows that seam to the shoulder and then either 1.) follow the grain straight down or 2.) a line complimentary to the line of the outside shawl collar.
Drafting a shawl collar isn’t that hard, but there are a couple of things to remember:

The thing is that once you get that back neck collar part, then you can go as far out or big or fun as you want. It’s best to do it in a muslin to make sure it’s not too far out, but I like gooshy things around my neck, so there’s no such thing as too far out for me.